Receiving with a Purchase Order
When you receive merchandise for which you created a purchase order in NCR Counterpoint, you can use CPMobile to create a receiver for the merchandise, and then save the receiver to Counterpoint for posting.
Follow these steps to receive items with a purchase order:
- On the main menu, tap Inventory, and then tap Receivings.
- Tap Load Purchase Order to display the
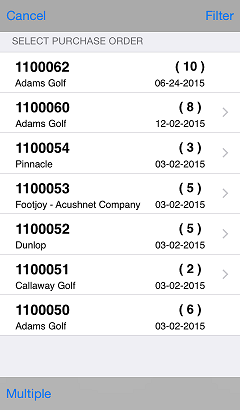
 Select Purchase Order screen, which displays the available purchase orders in your Counterpoint database, including the PO number, vendor, number of lines (in parentheses), and the order date for each purchase order.
 Only purchase orders in the batch associated with your User ID appear on the Select Purchase Order screen. To load purchase orders from another batch, log in to CPMobile with the corresponding User ID.
To display purchase orders for a particular vendor, tap Filter, enter all of part of the vendor number in the Search bar, and then tap the vendor.
To search for a vendor by name, tap Vend Nm, and then enter all or part of the vendor's name in the Search bar.
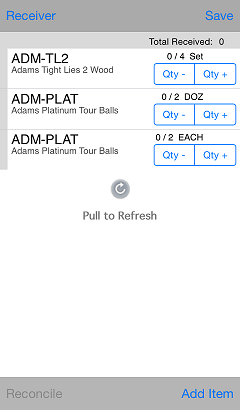
- Tap a purchase order to create a receiver for the purchase order and display the Receiver screen, which includes information about the receiver document, followed by the lines on the receiver.
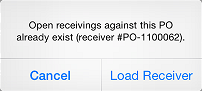
A ![]() message appears if a receiver already exists on the server for the purchase order you selected. Tap Load Receiver to load the existing receiver on your CPMobile device.
message appears if a receiver already exists on the server for the purchase order you selected. Tap Load Receiver to load the existing receiver on your CPMobile device.
 If you are using NCR Counterpoint V8.6.12 and you load an existing receiver that includes discounts, Gross unit cost changes, or New Price-1 values, they will be discarded from the receiver when you export it from CPMobile to your server. If you are using Counterpoint V8.5 or later, these values will be retained.
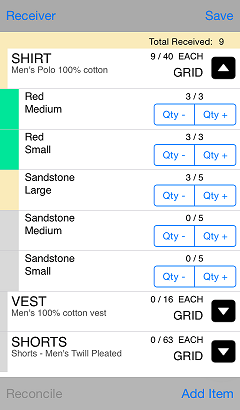
Each line on the receiver corresponds to a line on the purchase order and includes the item number and description for the item, as well as the received and expected quantities (e.g., 3/3), and the received unit for the item.
If the Quantity Received Defaults to Expected Qty setting on the Receivings Options screen is ON, the received quantity for each item is automatically set to match the expected quantity on the purchase order.
- Specify the received quantity for each item on the receiver.
If you are using an iPhone or iPod Touch with a CPMobile sled or a Socket Mobile Barcode Scanner, you can scan an item's barcode to set the received quantity for an item on the receiver.
- If the Scan = Qty 1 setting on the Receivings Options screen is ON, the received quantity for the item is increased by 1.
- If the Scan = Qty 1 setting is OFF, you are prompted to specify the received quantity for the item. Enter the quantity to add to the receiver line and tap OK.
To enter the received quantity for a non-gridded item, tap the receiver line, enter the Quantity you are receiving, and then tap Done.
- or -
Use the  buttons to modify the received quantity for an item:
- Tap the
 button to increase the received quantity by 1.
 - Tap the
 button to decrease the received quantity by 1.
You cannot reduce the received quantity of a line on an receiver that already exists on the server. A ![]() message appears if you attempt to do so, alerting you that the received quantity for the line cannot be reduced.
message appears if you attempt to do so, alerting you that the received quantity for the line cannot be reduced.

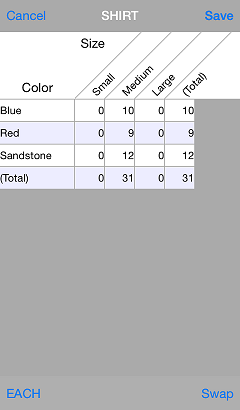
To specify the received quantity for a gridded item, tap the receiver line to display the ![]() grid table, enter the received quantity for each cell, and then tap Save.
grid table, enter the received quantity for each cell, and then tap Save.
- or -
Tap the  button to
 ![]() expand the receiver line, and then:
expand the receiver line, and then:
- Tap the button to increase the received quantity for a grid cell by 1.
- Tap the button to decrease the received quantity for a grid cell by 1.
By default, the grid table displays the first two dimensions in the grid (e.g., color/size). If the grid has three dimensions (e.g., width), tap the corresponding button to display the grid picker, which allows you to select the dimension you want to summarize and filter it to a specific value. Tap the Swap button to change the positions of the dimensions in the grid table.
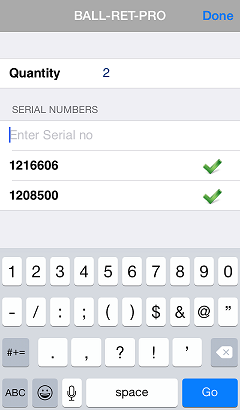
To specify the received quantity for a serialized item, tap the receiver line, ![]() enter or scan the serial number(s) you are receiving, and then tap Done.
enter or scan the serial number(s) you are receiving, and then tap Done.
If the Color-code Receivers setting on the Receivings Options screen is ON, the ![]() color of the receiver header and of the strip on the left-hand edge of each receiver line indicate the status of the entire receiver and of each line, respectively.
color of the receiver header and of the strip on the left-hand edge of each receiver line indicate the status of the entire receiver and of each line, respectively.
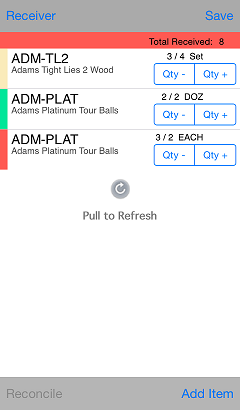
- Green indicates that the received quantity and the expected quantity for the line or the entire receiver are equal.
- Yellow indicates that the received quantity for the line or the entire receiver is less than the expected quantity.
- Red indicates that the received quantity for the line or for at least one line on the receiver is greater than the expected quantity.
- Grey indicates that no received quantity has been entered for the line or the receiver.
To change the received unit for an item with alternate units, tap the receiver line, tap the ![]() unit button for the unit you are receiving, and then tap Done.
unit button for the unit you are receiving, and then tap Done.

- To add an item to the receiver that isn't on the original purchase order, scan the item's barcode or tap the Add Item button to display the Items screen and look up the item you want to add to the receiver.
If the item you are adding to the receiver is gridded, you will be prompted to specify the received quantity for each grid cell; if the item is serialized, you will be prompted to provide the necessary serial number(s).
- When you finish receiving items, you can export the receiver to Counterpoint by tapping the Save button, or you can tap the Receiver button, and then tap Back to return to the Receivings screen.
If you return to the Receivings screen without exporting the receiver, the pending receiver is stored on your CPMobile device.